How to grow your Oyster Mushroom Kit

Introduction
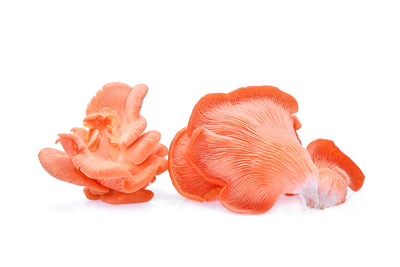
Italian, Velvet and Pink Oyster mushrooms are a staple for any hobby mushroom grower. Easy to cultivate and forgiving of any mistakes. They grow quickly, you can have a fresh harvest of oysters on your plate within 2 weeks* (this is a guideline, and it may be longer)! There are many different types of oysters, this guide is applicable for Italian, Velvet and Pink Oyster. All variants produce excellent mushrooms that are the tastiest you will find. This guide explains how to fruit (grow) oyster mushrooms into three simple steps. Step 1 is opening the block, step 2 is primordia formation, or 'pinning', and step 3 is fruiting.
Step 1: Opening
Inside the box you have a fully colonized bag. Once you tear off the perforation on the front of the box, you need to cut a 5cmx5cm ‘X’ in the bag. Prep the mushroom bag by wiping the front face and a razor blade or shape knife with alcohol-based hand sanitiser. This will remove any bacteria which can grow on the substrate. Like most oysters, these species are a prolific grower, and opening the entire block to the atmosphere will cause far too many pins (small mushrooms) and will waste the energy in the block. We need to direct the mushrooms where to grow, this is done but cutting the ‘X’ in the bag directly over the substrate. When the fresh air and humidity hit the exposed substrate under the cut, primordia or pins should form there.
DO NOT TOUCH THE SUBSTRATE! Touching the substrate can introduce bacteria to it and cause the mushroom pin sets not to form.
AND NEVER TAKE THE PLASTIC OFF THE BLOCK!
Step 2: Primordia Formation
To form primordia, or 'pinning' you need to provide the block and the ‘X’ opening with four elements.
Light - Contrary to popular belief, mushrooms need a bit of light to grow. Good old fashioned natural light! But do not leave it directly in the sun. Indirect diffused sunlight is best. It should have around 12 -14 hours of light a day. Oyster Mushrooms will not grow in your dark closet!
Humidity - During the pinning stage, the oyster blocks like it close to 100% humidity. Lightly mist or spray the ‘X’ in your block 3-5 times per day. Be careful not to over water and the area, the ‘X’ should be lightly moist, do not soak. A pocket of humidity is created under the ‘X’ and it helps the mushroom pin sets form.
Fresh Air Exchange (FAE) - Mushrooms love to create CO2, they do this as they break down the wood substrate. If there is too much CO2, they just won't fruit. To prevent this, we need to ensure there is plenty of fresh air moving around the oyster block. If you have your block in a room like the bathroom, cracking open the window will help. If the CO2 content is too high, the mushroom will tell you by growing really long stems as they search for fresh air. Don’t be too concerned about the fresh air requirements unless you are getting mushrooms with long stems. Just crack open a window!
Temperature - Italian and Velvet Oyster mushrooms like a mild temperature, and Pink Oysters prefer a warmer temperature. Between 16-24 is great for Italian and Velvet Oysters. You will find Pink Oysters do not like to grow below 15 degrees, and it can stunt their growth. If Pink Oysters remain small, it is sign that it’s too cold and too dry.
Step 3: Fruiting
This is the part you have been waiting for. All going well, you have provided your block with the perfect conditions and have some good pins growing. Now is the time to take them through adolescence into maturity. At this time, the humidity can be dropped slightly back, but still needs to be high. Over 65- 70% is good (common in the north of NZ). The temperature should remain between about 16-20 degrees. Try to keep the humidity and temperatures constant during this stage and the mushrooms should form. To do this we can continue to lightly spray the mushrooms to ensure they have some humidity. If you leave the Italian Oyster to grow, they will become huge. We like to pick them before they get too large, when they are just perfect size for cooking. Once picked, place the mushrooms in a paper bag inside the fridge as quickly as possible. If stored correctly, your oysters can last up to 10 days!
Check out our website or find us on Instagram to look at some good examples of a fully fruited kit ready for harvesting.
Step 4: Repeat Process
After you have harvested the mushroom bouquet once, use a clean knife, and cut away any excess mycelium (the white stuff). Again, keep spraying the exposed substrate with water a few times a day, and within a couple of weeks you should get a second crop of mushrooms. You will be surprised just how many mushrooms will grow from a single block. Growing Italian & Pink Oyster mushrooms is a fun and exciting way to grow your own mushrooms at home. They fruit quickly and within a couple of weeks you can have fresh Oyster mushrooms for breakfast, lunch or dinner!

Italian and Pink Oyster mushrooms growing out of Oak and Spore Mushroom Kits
Bonus Step!
Please remember to write a review about your mushroom growing experience on our website, or Facebook/Instagram! Don’t forget to FOLLOW us on Facebook or Instagram - thanks!
Frequently Asked Questions
-
Are these edible mushrooms? Absolutely, they are 100% edible and safe for consumption.
-
Do I need to start growing as soon as the farm is purchased/taken home? Not necessarily. For Italian and Velvet Oysters, you can leave the box inside a fridge to extend their shelf life for weeks/months, and for Pink Oysters you can leave the box in a cool dark place like a garage (not the fridge). However, we recommend starting the growing process as soon as you can.
-
How long do they take to grow until we can eat them? On average, it takes up to 2 weeks for the first flush to be ready for harvesting, you may even get a second or third flush if you are lucky.
-
How much mushroom will I get in total? You may get up to 800 grams of mushrooms, and perhaps up to 1.2kg if you are lucky to get more than one flush.
-
Do they grow indoors or outdoors/best location to grow them? They need to be grown indoors, ideally in a warm spot that gets some fresh air like the kitchen or the bathroom.
-
Do I need to add/mix/plant anything? All you need to do is mist water daily, make sure to follow the instructions we have provided especially about the humidity!
- Looks like there is green/black mould forming on the front, what to do? Scrape a thin layer off the front of the substrate with a clean knife (do not touch the substrate) and continue misting daily until growth begins. You can also close the contaminated X with the tape, turn the bag around and start the process again from the other side. If there is no growth after 21 days, please take a photo of the kit and contact us.
- My kit isn't growing, but my friend is already harvesting theirs, what to do? All individual kits are affected by different environmental conditions, the type of variety it is (Italian, Velvet, Pink) and a bit of luck is involved. Don't fret if yours hasn't started yet, be patient and give it a few more days of daily nurturing. Our growing timeframes are a guideline only. If there is no growth after 21 days, please take a photo of the kit and contact us.
-
How long do the mushrooms last if I do not eat them immediately/same day once they are ready for harvesting? Once harvested from the box, the mushrooms should last you a few days in the fridge if stored correctly in a paper bag.
-
What is that white stuff on my kitchen bench/surface around the box? They are mushroom spores. Once the mushrooms start to overgrow, they begin to drop spores, so ensure you harvest them before they do this too much. If it happens, you can easily wipe them away with a cloth.
- How do I dispose of my mushroom box? Remove the plastic bag from the substrate block and put that in your rubbish bin. You can break up the substrate block and add this to your compost or directly onto your garden as mulch. Lastly, flatten the cardboard box and put that in your recycling bin.